Vex Computer Science with Vex VR – Courses

I’m impressed with the Vex certification courses offered here:

https://certifications.vex.com/educator

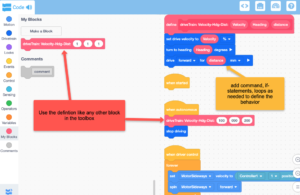
I just did the two for VexVR (vr.vex.com) for Vexcode Blocks and Vexcode Python. They were both very good in the incremental introduction of both programming and a lot of the sensors.

The other thing that the courses did was introduce me to the virtual coding environments for this year’s competition. (codev5.vex.com and codeiq.vex.com). Those environments have a playground modeled on this year’s game, and a virtual robot loaded up with sensors to play that game. To use the virtual skills environments, you’ll need the “Virtual Skills Key” that you get with team registration. For me, the relevance of the current game in the virtual environment was enormous.

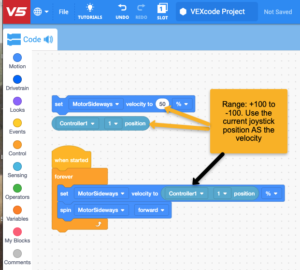
For the V5 and the SpinUp game, their “hero bot” details are here: https://kb.vex.com/hc/en-us/articles/360060687012-Understanding-Robot-Features-in-VRC-Virtual-Skills#robot-controls-LKwfC

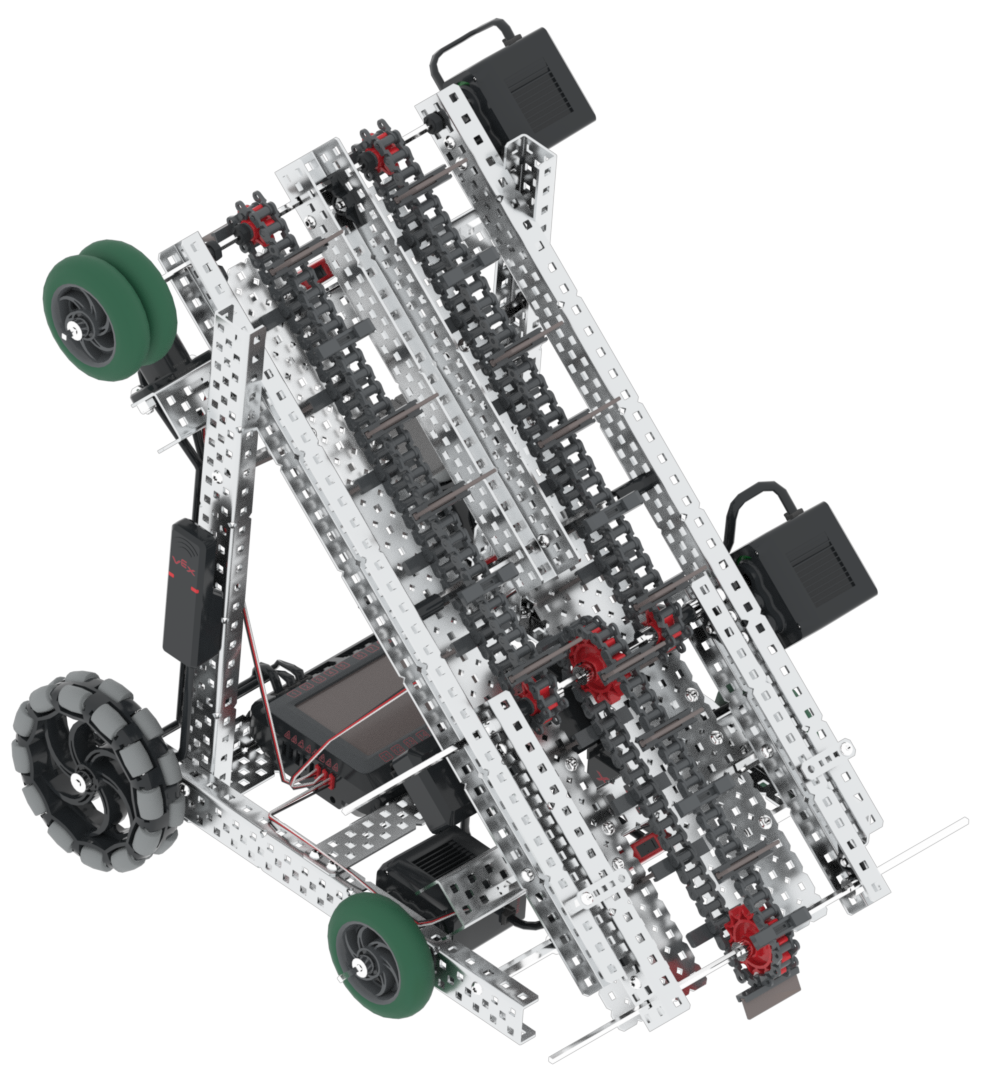
That robot is a great start to using the sensors and in a very relevant playground. The robot also has all kinds of potential improvements, so it shouldn’t stifle creativity to improve.

Vex IQ also has a virtual skills playground and hero robot:

https://kb.vex.com/hc/en-us/articles/6423365106580-Understanding-Robot-Features-in-VIQC-Virtual-Skills

Vexcode: MyBlocks Simplify Your Code

When writing code, you can end up with LOTS and LOTS of lines of code (or Blocks). The sheer volume of instructions can become overwhelming, and you can lose sight of what the program is supposed to do.

MyBlocks (and functions in Python) are the solution! They enable you to encapsulate the details of how to do something, … and give a name to that group of instruction details.

Subsequently, you can use the name of the MyBlock anywhere that you would have had to replicate all those instruction details.

If you find later inspiration – and figure out how to implement those instructions differently and better, you only need to update the MyBlock. All the places that used the MyBlock by name will invoke the newly updated code without you needing to update each place that you had used it.

Here are a few screen captures to help illustrate the idea:

You need to click on the red “My Blocks” icon, and then the “Make a Block” button:

make a new MyBlock

Then, create a meaningful name that describes the behavior that you want:

Name your MyBlock

Then, add any input parameters that you want.

Creating Input parameters for your MyBlock

I had started out thinking about the new GPS sensor, but ended up creating/editing the MyBlock to support the drivetrain. See the yellow callout for the definition, and the red callouts for using the MyBlock.

Notice in the definition (yellow callout), I used the values coming in through the input parameters to populate the commands to the drivetrain. Those carried through parameter values are in red ovals.

I show this block in Autonomous, but the block is available for driving mode as well.

Add defining statements to the MyBlock and use it from the MyBlocks toolbox

Here’s a video from Vex that explains the MyBlock in detail (you may need to login): https://codev5.vex.com/static/tutorials/v5/videos/V5_Blocks_MyBlocks_V2.mp4

Vexcode: Setting Motor Velocity with Joystick Position

Use the value of the joystick position to set the motor velocity in Vexcode Blocks

A question came up recently about how do you use the controller to manage the motors (or drivetrain).

The key is that the range of the joysticks is exactly the same as the range of the motor velocity input:  -100 to +100.  When we set the motor velocity to 100 (%) – we’re setting it to full speed, and that is the same as the joystick pushed to the full extent.

Here’s a picture of that in Blocks:

Use joystick position to set velocity in Vexcode Blocks

Computer Science (CS) with the Vexcode VR Educator Certification Course!

Starting the Vex VR certification for Blocks. It looks very good.

Wow!

I’m doing the online free course above and focusing on Blocks – https://certifications.vex.com/training/vexcode-vr/computer-science-level-1-blocks-certification-course. So far it is awesome!

I’ve taught using Vexcode Blocks before, but this course is ensuring that I don’t have gaps in my knowledge.

I’m jumping into a lot more online VR coding because we don’t have practice robots for coding while the teams are building their robots. And, we don’t want to wait until the robots are built – before learning to program them.

What are your experiences with the environment?

What is programming?

Programming is making a checklist for the robot brain to sense and respond to the world.

What is programming?

I get all kinds of answers to that question.

    • Programmers make really cool games
    • Programmers make the Tesla cars drive without humans
    • Programmers can access banks and infrastructure like nuclear power plants

I never get: Programmers make checklists for computers to follow.

But, … that’s what programmers do.

We’re talking about programming robots, and specifically the robot brain, so from this point forward – I’m going to say “robot brain” instead of computer.

Programmers make checklists for the robot brain to follow. The robot brain will monitor its sensors (sources of input about the outside world) and activate or de-activate motors based on those checklists.

Even in driver mode, the driver doesn’t directly control the motors on the robot. The programmer writes code to tell the robot brain what to do when the driver pushes buttons or moves joysticks on the controller. Then the brain tells the motors what to do based on the checklist (program) the programmer gave the robot.

In a way, the robot is always in autonomous mode!

In driver mode, the driver gets to touch the brain’s controller inputs.  In “autonomous mode,” the competition template blocks any input from the controller.  All of the brain’s awareness of the playing field has to come from other sensors like the bumper, range, color, motor distance encoding, inertial, vision, and the Game Positioning Sensor (GPS) or in the worst case scenario – from timing.

Next post, we’ll look at approaches to making those checklists flexible enough to enable the robot to sense and respond to scoring challenges!


Vexcode: Programming Tank and Arcade driving in Blocks.

Demonstrations and examples of Vexcode Blocks programming for driving, using ranging sensors for claw height and for forward distance.

We covered using the MyBlocks to simplify the code. Using those MyBlocks – we printed out sensor readings (range finder values and joystick values), we created a tank drive block and an arcade driving block.

We also proved that the “drivetrain” block does not handle turns correctly, particularly when it doesn’t have an inertial sensor configured. We made this proof by printing out the joystick values as we drove, and the turn was erractic.

The Vexcode Blocks coding will work with either the V5 or the IQ controllers – so feel free to join. If this would be your first time – email me at steve.rhoads@stemrobotics.org, and I’ll invite you to the Zoom.

Download the code from the session